At the top-left of the 1099-X Plan Year screen, you'll find the Edit Payer Data box. Clicking Edit Payer opens the Payer Data screen, where you can edit or update payer information.
Most fields will be pre-populated from the Edit Plan/ Edit Company screens, except for the Payer TIN.
Note: The Payer TIN is the taxpayer’s identification number used for 1099/5498 distributions. It is generally different from the Employer Identification Number (EIN) used on Form 5500/SF filings.

To update payer information:
- Enter the new data directly into the fields.
- Changes are saved automatically as entered.
- Click Run Edit Checks in the upper left-hand corner of the Payer Data screen to validate the data.
- Fields with invalid data will be highlighted in red and will not be saved.
- Potential errors will be highlighted in yellow.

Note: To update default Company/Payer data, refer to the following article: Edit Company.
For organizations managing a large number of payers, Payer TINs and related data can be uploaded in batch mode.
Companies and plans must already be set up in the system before proceeding.
Note: New users without plans set up can send a list of client EINs to support@ftwilliam.com.
Prior year Form 5500/SF data from the Department of Labor (DOL) can be imported—regardless of the previous vendor (e.g., 55AutoFill). This service will add companies and any filed 5500 plans to the account.
To use this free service, email a spreadsheet with all company EINs and include the ftwilliam.com Company Code.
A subscription to the 5500 module is not required to use this feature. It is intended solely to help establish companies, plans, and any applicable available data.
Steps to Download and Upload Payer TINs and Data
Step 1: Access the Upload/Download Center:
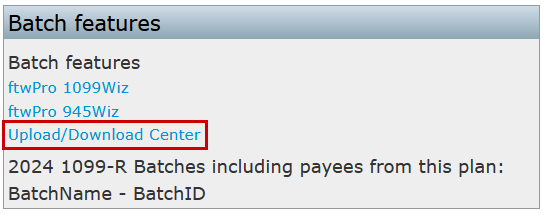
- Navigate to the Upload/Download Center located in the Batch Features box on the 1099-X - Year screen.

Step 2: Download Payer Data:
- Click Download Payer Data under Upload/Download Payer Data and save the .csv file to your hard drive.

Step 3: Open and Review the Spreadsheet
- Open the downloaded spreadsheet, which lists all the plans available within the company code.
- The first two columns are company and plan specific—do not alter these.
Step 4: Update the Data:
- Update the TrustEIN, Responsible Party, and Company Data as needed.
- Plans that will not require 1099/5498s can be removed, but it is not mandatory to do so. Any fields that are not altered will be silently skipped upon upload.
- New plans cannot be added through this upload. Missing plans must be added manually as outlined in the following article: How to Manually Enter Payer Data.
Step 5: Upload the Updated File:
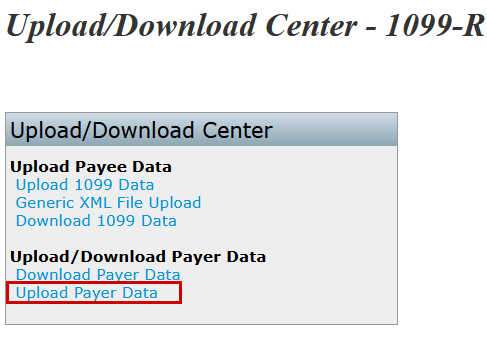
- Save the updated file and return to the Upload/Download Center.
- Select Upload Payer Data.


Step 6: Select and Submit the File
- On the Upload Payer Data screen:
- Browse for the saved file.
- If notes were added above the header row, enter the Number of Rows to Ignore Before Header Row. This will default to zero, as the Header Row will typically be the first row on the user's spreadsheet. Do not delete the column headers.
Step 7: Complete the Upload
- Click Submit to upload the file. The total number of Payers added will be displayed.
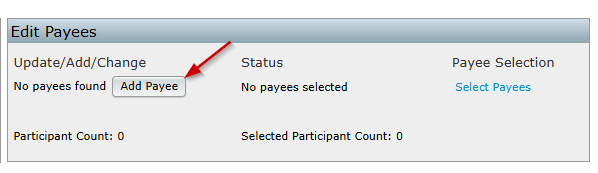
- When the user is on the "1099-X - Year" screen, the user would click on "Add Payee" button within the "Edit Payees" box.
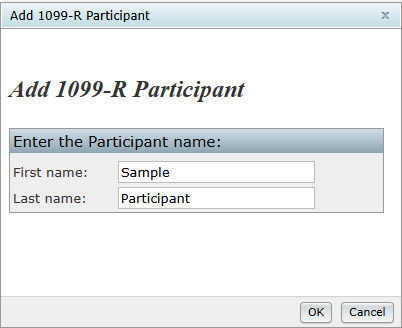
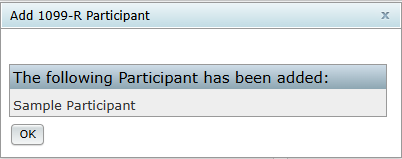
- The user will receive a prompt to enter a Payee's First Name and Last Name. Then, the user will click "Add Participant", then "Click here to return" or "1099-X Year" within the breadcrumb trail.
- This will direct the user to a draft Copy A for the user to complete. From this screen the user is able to run edit checks, add more Payees, go to the 945, 945-A, 945-X or even print non-Federal final copies.
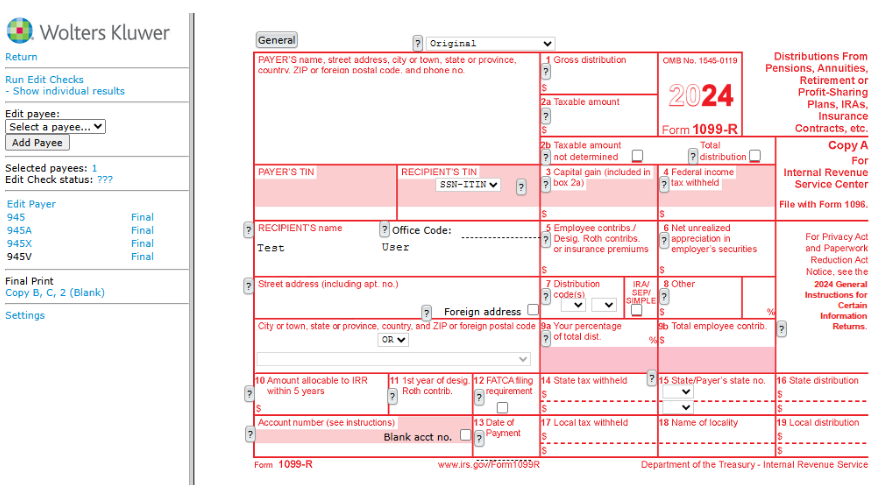


Below the draft form, the user will have the option to add up to 12 distribution dates and amounts for the payee if those distributions have the same distribution code(s) as on the draft form. This is helpful for completing the Form 945. Note: If the payee received multiple distributions, but the distribution codes are not the same, the user will need to complete a 1099 record for each distribution type.
The user should run edits checks once the form is complete. See Edit checking below.
Note: The Question Marks  on the draft screen are context-sensitive help buttons that reference the IRS instructions. The user should click on them for guidance.

Uploading Payee data in bulk is an efficient way to manage large numbers of Payees. This process is completed through the "Upload/Download Center" and allows for batch uploads, saving time compared to manual entry. There are two different options to upload this information.
Follow the steps for Option 1 (Uploading a Spreadsheet) or Option 2 (Uploading Vendor XML file) to complete the upload for Payees.
Option 1
- Navigate to the Upload/Download Center located within the "Batch Features" section on the "Form 1099 - Year" screen.
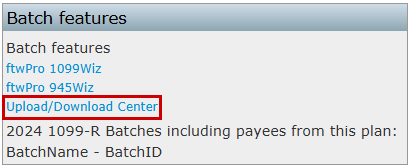

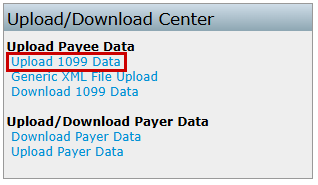
- From the available options under Upload Payee Data select Upload 1099 Data

- Select an upload method:
- There are two methods for uploading data as well as applicable sample templates:
- Payer TIN: Use this method to upload Payees based on the Payer's Taxpayer Identification Number (TIN). This is the traditional approach for most users.
- For Payer TIN, download "Sample_PayerTIN_1099R_2024.csv."
- Company EIN/Plan Number: Use this method to upload Payees when multiple plans share the same TIN. This option ensures data accuracy for individual plans.
- For EIN/Plan Number, download "Sample_EINPN_1099R_2024.csv."
- Payer TIN: Use this method to upload Payees based on the Payer's Taxpayer Identification Number (TIN). This is the traditional approach for most users.
- There are two methods for uploading data as well as applicable sample templates:
- The downloaded file serves as a template for entering Payee information:
- Enter Payee Data: Populate the spreadsheet with all necessary data for one or multiple plans, grouped by TIN or EIN/Plan Number (PN).
- Follow the Format: The "Field Names" schema file provides details on how to format the data correctly, including column headers and data requirements.
- IND Columns: Use 0 to leave checkboxes unchecked and 1 to check them.
- Additional Distributions: Up to 12 additional distributions can be included for a Payee using the columns PayDate1–PayDate12, PayAmount1–PayAmount12, and PartWHAmount1–PartWHAmount12.
- To see a sample upload file for a batch upload of all payees grouped together by the payer's TINs, click here.
Note:
- Do not delete the column headers.
- If current payees have been added, the user will be able to override existing payees. If the user does not wish to override existing payees, the user will need to un-check the box before performing the upload.

- Upload the Completed File:
- Return to the "Upload 1099 Data" section in the Upload Center.
- Browse for and select the prepared .csv file.
- Click "Submit" to upload the file.
- Review the Upload Results:
- After submission:
- The results will display the total number of Payees successfully added and highlight any "Bad Data" that requires attention.
- Verify the uploaded data in the "Edit Payees" dropdown.
- After submission:
Option 2
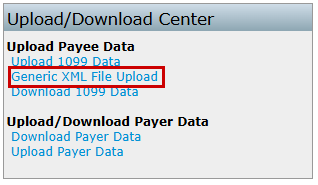
The Generic XML File Upload is primarily used to import data downloaded from another vendor's Software. If you are having trouble with the upload, please contact support@ftwilliam.com.
- Navigate to the "Upload/Download Center" located within the "Batch Features" section on the "Form 1099 - Year" screen.
- Under the Upload Payee Data select Generic XML File Upload.

- Upload the XML File:
- Click Browse and locate the saved .xml file on the computer.
- Click Submit to upload the file.
Note: The upload will replace any data previously uploaded or manually entered.
- Review the Upload Results:
- Note that "Upload Results" will not provide detailed feedback.
- Proceed to run edit checks to ensure the uploaded data is accurate.
- Return to the 1099 Module:
- Use the breadcrumb trail to navigate back to "1099-X Year."
- After uploading, verify that all Payees appear in the "Edit Payees" dropdown.
Note: Regardless of method after uploading once uploaded, running edit checks is essential to ensure the accuracy of the uploaded data (see Edit Checking for additional information).
After entering or uploading Payee data, running edit checks ensures data integrity by identifying errors and warnings. Users can perform edit checks for multiple Payees or an individual Payees by follow the steps below:
Running Edit Checks for Multiple Payees
- Select Payees to Edit:
- Click Select Payees in the Edit Payees box.
- Check the box next to each Payee to include in the edit check.
- Click Update to confirm the selection. The number of selected Payees will display in the Edit Payees box.
Note: The Selected Participants will automatically default to all payees available unless the plan has been added to a batch. Therefore, the count from Selected Participant Count and Participant Counts may vary.

- View Errors for Selected Payees:
- Click "???" or "NOT-OK" in the "Status" column.
- All errors for the selected Payees will be displayed in a list.

Note: If errors are present, selecting the Edit link next to the payees name will open the payee's specific 1099 for editing.

Running Edit Checks for a Single Payee
Select an Individual Payee:
- Choose the desired Payee from the dropdown menu in the Edit Payees box.
- Click Select Payee to open the draft 1099-R for that Payee.

Run the Edit Check:
- Click "Run Edit Checks" on the draft 1099.
- Any questions on the form that fail the edit check will be highlighted in yellow.
Review Issues:
- Double-click a yellow-highlighted box to view the reason for the edit check.

Understanding Edit Check Results
Edit checks are split into errors and warnings:
- Errors: Errors must be resolved before locking a batch. For example, a missing SSN for a Payee will trigger an error, preventing batch locking until corrected.
- Warnings: Warnings will not prevent batch locking but should still be reviewed and addressed as needed.
Once the data has been entered and the edit checks have been run users are ready to print and/or create batches.
- Select the 1099 software for the previous year's filing;
- Click on the "Upload/Download Center" under the "Batch features" box;
- Click on "Download 1099 Data";
- Click on "Select Payers";
- Check the boxes for the Payers that will be uploaded into the current plan year, click update, click "Download 1099 data" within the breadcrumb;
- Click "Download 1099 Data" to download the data, save file;
- Update this file for changes (remove payees that are not applicable, update addresses and amounts, etc.). Ensure column names, etc are not being changed;
- Click on 1099 within the breadcrumb and select the current plan year;
- Click on "Upload/Download Center" under the "Batch features" box;
- Click on "Upload 1099 Data";
- Verify that the "Payer TIN" option is selected;
- Users may want to review the "Field Names" file to see if there is new data to enter for the new year and to verify column headers are accurate; and
- Browse for the saved file, enter zero for Number of rows to ignore before header row, if users have not added rows above the header rows, and click "Submit". The system will perform data integrity edits on uploaded data and will reject non-compliant data that cannot be corrected. Be sure data complies with 1099/5498 requirements before uploading and verify uploaded data afterwards.
NOTE: This document is intended for informational purposes only and does not constitute legal or tax advice.
A newer feature available for the 2014 and current 1099-Rs.
Similar to the 5500 Module, the 1099-R Module is now able to "Bring forward [prior year] 1099 Participants for this plan only".
Master and Designated Admin Users also have the option to "Bring forward [prior year] 1099 Participants for all plans".
The data that is pulled forward is limited to basic Payee data, such as Payee Name, Address, Account Number and Distribution Code. No values will be brought forward as they are subject to change from year to year.

