The 5500 Workflow Grid (sample screenshot shown below) replaces all the functionality of the prior "Review/Assign Detail Status/Extensions" grid, but has a number of new features. You may access the 5500 Workflow Grid by clicking on the "Batch/Workflow" link from the "Form 5500 - Year" screen. It can also be accessed from the "Admin Menu" at the top of most pages after log-in under "5500 WorkFlow."
Note that not all options may be available for all ftwilliam.com 5500 software users.
 |
The 5500 Workflow Grid; Batch Invite 5500/SF; Admin Summary Status batch options will all open a data-entry grid resembling the view shown below. Each option displays different information and not all options may be available for all ftwilliam.com 5500 software users. You can access the grids by clicking on the "Batch/Workflow" link from the "Form 5500 - Year" screen.
Each option will allow you to view data for all the plans on the system at once in a grid format. Many grid fields will allow you to change/update items directly in the grid. Each grid will be explained in detail below.
- Batch Year: Select a plan year from the drop-down list.
- Upload/Download Plan Admins.
- Download Current Admins
- Upload Revised Admins
- Upload/Download Unique IDs.
- Download Current Unique IDs
- Upload Revised Unique IDs
Note that the upload and download features were available under the prior 'Review/Assign Detail Status/Extensions' grid but that we expect some users would rather use the "Do with selected" feature discussed below for updating plan admins.
- Default Template: Master and Designated Admins will start off with a Default Template.
The grid options that appear for all users will depend upon what template is selected by the admin user(s) at the bottom of the '5500 Batch Workflow Grid' page. If you do not see one of the columns described below, the admin user has likely selected a different template for its users.
- Default column headers include:
- Status (Not Done, Locked (Ready for Signature), Invited, Accepted, Not Accepted)
- Resp (Yes/No)
- Admin (admin assigned to the plan)
- AckID (acknowledgement ID from the DOL)
- Last Invited (date the signer(s) was last invited to sign)
- Date Filed (date the filing was submitted to the DOL)
- Date Accepted (date the filing was not accepted/accepted by the DOL)
- Signed Status (Invited/Not Signed/Signed)
- Signer Name(s) (Pulls from the work with signer/portal user first, local sign second, 5500 third)
- Unique ID (Editable field)
- Type (5500/Schedule SF/5500EZ)
- Company Name (pulled from Line 1 of the 'Company Information' on the 'Select Plan' screen)
- Plan Name (pulled from Line 2a of 'A. General Information' of the 'Edit/Print Menu' screen)
- EIN (pulled from Line 8 of the 'Company Information' on the 'Select Plan' screen)
- Plan Number (pulled from Line 1 of 'A. General Information' of the 'Edit/Print Menu' screen)
- Plan ID (ftw specific ID- uneditable)
- PlanID (UDF)- (User Defined Field that correlates to the Plan ID on the Edit Plan screen)
- 5500 PYE (PYE date on the 5500)
- Form 8955 (Yes/No - 8955 present or not)
- Form 8955 PYE (PYE date on the 8955)
- Form 5558 (Yes/No - 5558 present or not)
- 5500 Extension Date (date on the 5558 for the 5500 extension)
- 8955 Extension Date (date on the 5558 for the 8955 extension)
- Edit Check Status (displays the status of the Form/Schedules/8955/5558 added to the plan)
- If you utilize Divisions, you will be able to add a 'Division' header (see Show/Hide Template Tray below).
- Default column headers include:
- Do With Selected:
This feature allows you to update plans selected in the first column of the grid to update the Resp, Admin, Unique ID column, Confirmaton E-mail, and up to 3 User Defined Fields (UDF). First, you need to select the applicable plans and then click on 'Do with selected'. Only admin users can update the Resp and Admin columns.
- Change a Column.
- Resp (batch assign Yes/No)
- Admin (batch assign admins)
- Unique ID (batch assign Unique IDs)
- Confirmation E-mail (batch assign Confirmation E-mail addresses)
- UDF1/2/3 (batch assign User Defined Fields)
- Change a Column.
-
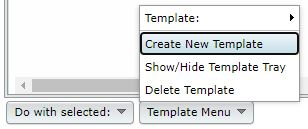
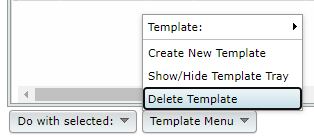
Template Menu:
- Template Default- This item will show the current grid template as well as any other custom template(s) created.
- Create New Template
- Create New Template (create a template, which will replicate the Default and select it from the Template drop-down list)
- Use only letters, numbers, spaces and dashes to create templates
- Once created, you will need to select that template from the Template drop-down list before you can edit it under the 'Show/Hide Template Tray' option described below (or delete it).
- Create New Template (create a template, which will replicate the Default and select it from the Template drop-down list)
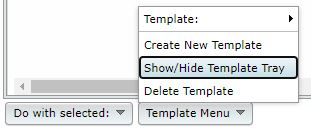
- Show/Hide Template Tray
- Show/Hide Template Tray (customize the Default or any template created).
- First ensure the template you want to work on is selected and then click to 'Show/Hide Template Tray'.
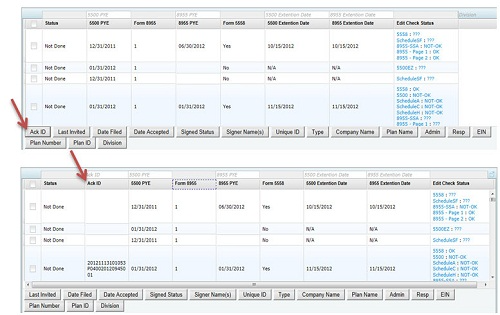
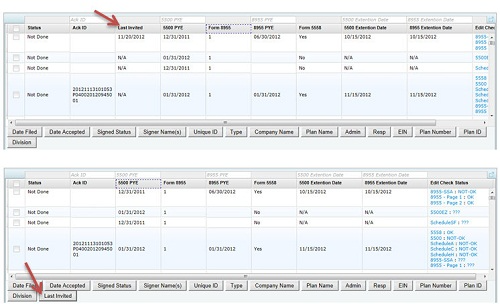
- Add column headers by clicking on the header in the tray. Note that headers will be added in the default order.
- Remove column headers by dragging them into the tray.
- Delete Template
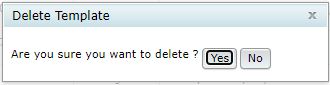
- Deletes the template that is currently displayed on the 'Template' button.
- Pop-Up window appears to confirm you are sure you would like to delete the template.
- Export current view to CSV
- Export a CSV file for the template you have selected.


- Batch Invite 5500/SF. This feature allows a user to review the plans that have been locked to see if users have been invited and whether the plan has been signed. This will allow you to send batch emails as either an initial invitation to sign the filing or as a reminder if the signer has been invited but has not yet signed. In order to use this feature, you must have specified a server under Global Email Settings.
The data entry grid will display signers that have been set up as a portal user on plans that have been locked and will display the status of the filing (Not-Signed, Invited, or Signed). You are given the opportunity to select the user to send the email invitation to. When you are ready, click "Invite Selected," you will be asked to confirm and the email(s) will be sent out.
The text of the email will be the "Invite Signers Email" that you set up under Global Email Settings.
Admin Summary Status. This grid allows a user to review the status of a particular administrator's assigned plans at a glance. Each column will be explained in detail below:
- Admin: displays the name of the administrator assigned to the plan (same as username used for logging into the ftwilliam.com system).
- Not Done: The number of filings assigned to the admin that have not yet been locked. (This will include any filings that may have been submitted and currently being amended and plans that have been rejected.)
- Locked: The number of filings assigned to the admin that have been locked but are awaiting signature.
- Invited: The number of filings that have been locked and an invitation has been sent (or marked as sent) to the signer.
- Submitted: The number of filings that have been signed and submitted to the DOL.
- Accepted: The number of filings that have been accepted by the DOL.
- Not Accepted: The number of filings that have not been accepted by the DOL.
- Total: Total number of 5500 plans allocated to the administrator.
- % Accepted: number of accepted plans divided by the total number of plans assigned to the user described above.
Note that users can be assigned to a plan under the 5500 Workflow Grid option described above.
