Clicking the Create New Edit Check button will take you to the Custom Edit Check Builder screen to create a completely customized edit check.

These are the steps you will take to create a custom edit check:
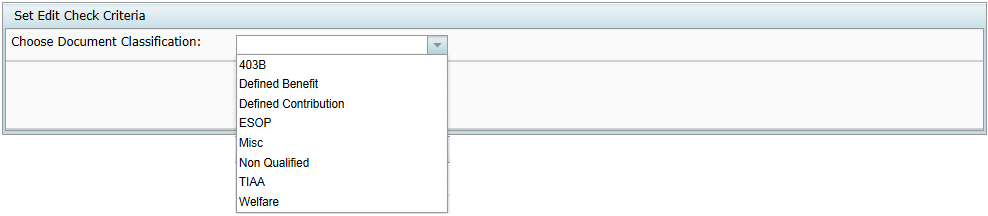
- Choose Document Classification – Use the drop down box to select a document type. Only one document type can be selected per custom edit check.
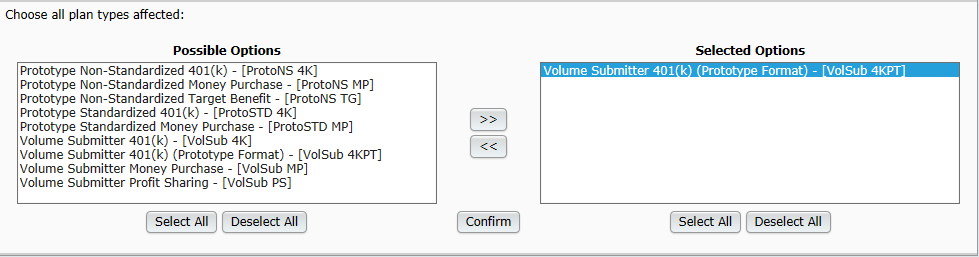
- Choose all plan types affected – Can select a single plan type or multiple plan types. Select multiple plan types by clicking on the plan type and pressing the ctrl button on your keyboard at the same time. If selecting all plan types, use the Select All button at under the possible options box. Click Confirm to move on to the next step.
- Create Edit Check Parameters – Here is where you will create the edit check.
-
- Filter by Section – Use this drop down box to select the section of the document that the edit check will apply to. This will reduce the fields you are able to select in Field Name to those in the selected section.
- Apply to Group - There are up to three different groups available. If a simple edit check is being created with only one field and one value, the group number will be irrelevant. The grouping will determine the "and/or" logic that is applied to the criteria of the edit check that involves multiple fields or values. This will be explained in greater detail below.
- Field Name – Use the drop-down box to select the name of the field that the edit check will look at (the available fields will be filtered depending upon the plan types selected - only fields that all types share will be available)
- Condition – Use the drop-down box to select the condition. Possible options include Less than, Equals, Not equal, Greater than, Less than, Greater or equal to, Less or equal to.
- Value – Depending on the field name selected, you will either select an option (or multiple options) from a specified list or enter the value manually.
- If selecting an option from a list
- You can select one option by clicking on the given value, then by pressing Add Line.
- You can select multiple options by simultaneously holding the ctrl button on the keyboard and selecting the multiple options in the list. Note that by selecting multiple options in a list in this manner, the multiple options will have "or" relationship logic.
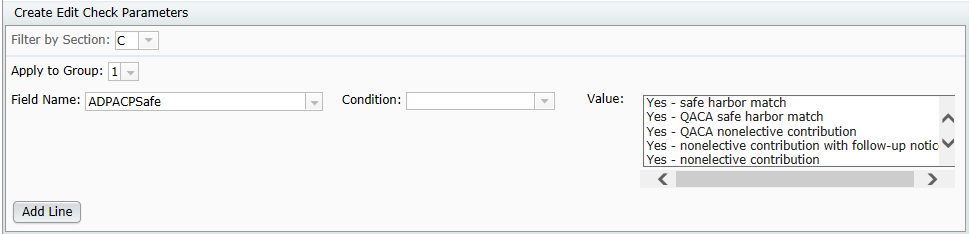
- Example: In the screenshot below, the Value is selected from a predetermined list. As such, no "ADD" button will be found, only the Add Line button.
If entering a value manually - The value entered can be numeric, alpha character or special character.

- You must enter a value, then press the ADD button
- Pressing the ADD button displays the amount entered in a box below the "Value" field.
- Now you have the option to either enter another value to add to the edit check and press ADD again; or if done, you may press the Add Line button to add the edit check to the edit check parameters.
- Let’s assume you are done and presses Add Line. Now the edit check will appear in the Display Edit Check Parameters:


- If selecting an option from a list
- Press ADD – The ADD button will appear if the value in the value field was required to be manually entered.
You will see an ADD button to the right of the value box. This ADD button should be pressed prior to pressing the Add Line button.
To create an "And" relationship between values in a group, complete the field name, condition and value, press ADD, then press Add Line
It is possible to create an "or" relationship between values in a group, as long as the field name does not change. To create an "or" relationship between values in the same group, complete the field name, condition and value, then press ADD. Then enter new data in the Value box and press ADD again. Each value that is added will have an "or" relationship. Press Add Line when done.
- Press Add Line
- After adding all edit checks within a group, press Add Line.
- To add a blank "Value" for a field that requires manually entered data, press Add Line without pressing ADD first.


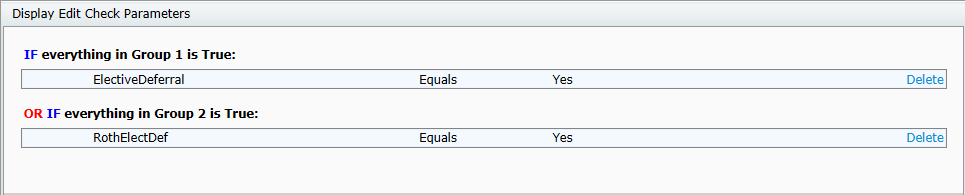
- Display Edit Check Parameters – After pressing Add Line the edit check criteria will be added to 'Display Edit Check Parameters'. If more than one line has been added, the lines will have either an "and" or an "or" relationship, based on the grouping and method of adding, as described above. Below is a review of the different logic options for the custom edit check.
- Parameters of different groups have "or" logic.
- Different Field Name criteria within the same group have "and" logic.

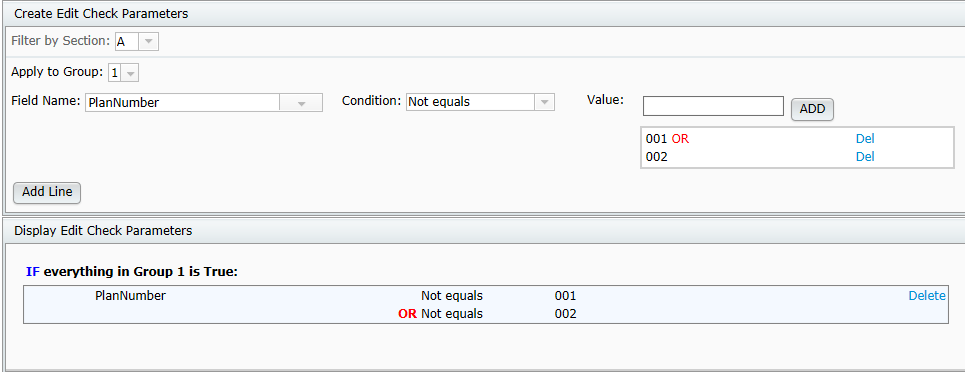
- Edit checks with the same Field Name may have "and" or "or" logic, depending on how the data is added. Example of "or" logic for same field name within same group: If you wanted to check a field for a ‘001’ or a ‘002’, you could set the first edit check to group 1, select the Field Name, set the Condition and enter a ‘001’ the Value field, then press ADD. Then you would enter a ‘002’ in the Value field and again press Add. Lastly, press Add line.
- Add a BLANK field (as shown below) by entering nothing in the "Value" field and pressing Add Line.

- Set Edit Check Error Criteria
- Section: Enter the section that the edit check applies to
- Go to Field: Enter the Field in which you should be directed to when the error or warning message is applicable.
- Error Type: Designate whether the edit check should be classified as a warning or an error.
- Warning – Fields that do not pass warning edit checks will be highlighted in yellow.
- Error - Fields that do not pass error edit checks will be highlighted in red.
- Custom Error ID: This field can be used to enter an identification number specific to the edit check. Users can use numbers, alpha characters or a combination of both. You can duplicate the same error ID or use a unique ID for every edit check.

- Press Update Edit Check to save the edit check and return to the Custom Edit Check Dashboard.


